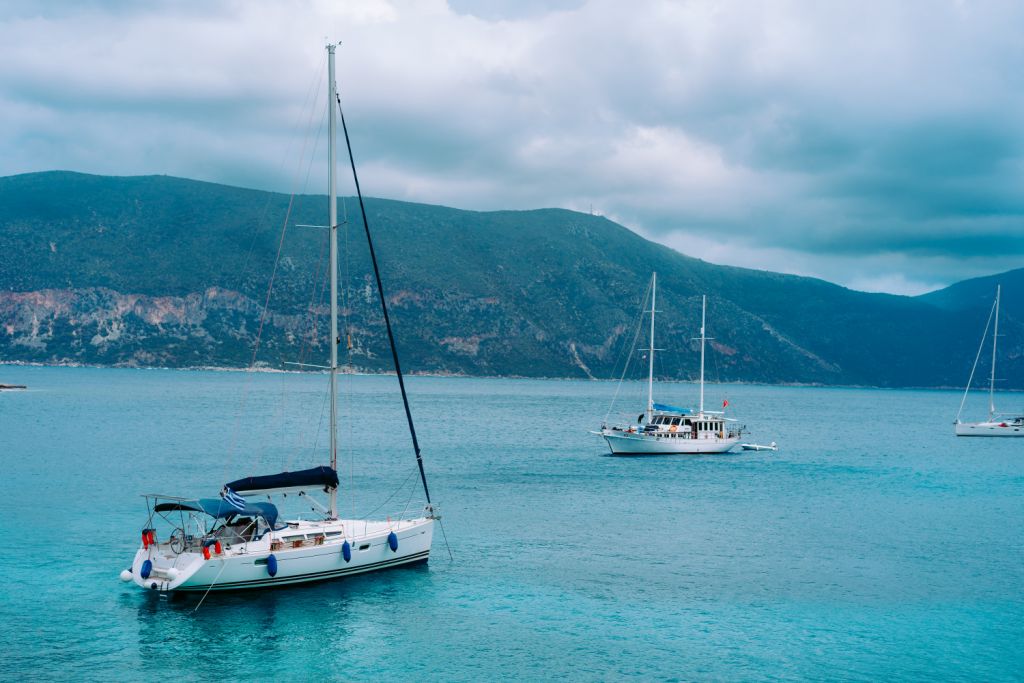
How to Anchor a Boat: 7 Critical Steps (Lake, River, Sea)
If you want all the freedom your boat can give you, you need to learn to set the anchor. It's not as hard as you think, and with preparation and practice, you can stay where you want to, when you want to.
It's not just a keel and hull and a deck and sails. That's what a ship needs. But what a ship is... what the Black Pearl really is... is freedom.
Captain Jack Sparrow
Point your boat at the horizon and you can go anywhere. Well, almost anywhere, so long as there are slips and moorings open when you get there. Or you have a reservation.
In this article, we'll give you the building blocks from the basic setup of your ground tackle, to picking a safe spot to anchor, and take you through the steps of getting a good anchor set. If you're looking to expand your horizons past the mooring field, read on!
How to anchor a boat in 7 steps:
- Make sure your ground tackle is solid.
- Pick a safe anchorage.
- Talk it through with your crew.
- Pick your spot to set the hook.
- Drop it, hook it, and set it.
- Set snubbers and other tools.
- Keep an anchor watch.
Get Good Ground Tackle
You need ground tackle - an anchor and a rode - which will hold your boat. Picking a style and size of anchor, choosing your type and length of rode, these are all crucial steps to safe anchoring. But unless you're buying a brand new boat, the odds are high you already have ground tackle of some type. The question is, is it good enough?
Good ground tackle meets the following basic criteria:
- The anchor must be big enough. It should meet the minimum size recommendation for your boat from the manufacturer, though one size up never hurt.
- Rope/chain rodes should have chain large enough to hold for the boat and anchor size, and at least one boat length long.
- There should be sufficient rode for at least seven times the total depth you plan to anchor in for chain, and ten times the depth for rope/chain. More won't hurt you.
- All connections and shackles should be seized (wrapped with wire to prevent unscrewing).
If you aren't familiar with your ground tackle, take it out. Measure the rode length, and make sure any ropes, chains, and anchors are sized for your boat. While you're there, think about marking your rode, then once you've measured it all make sure it meets manufacturer recommendations.
Since this is an entire topic on its own, I've written a detailed guide on ground tackle. It will help you to get a good sense of the different components, their function, and what to look for. You can learn everything about selecting ground tackle here.
Pick a Safe Anchorage
While you can just drop your hook anywhere it can reach the bottom, you won't always be happy with the results. Anchoring in a exposed position may not end well, with the anchor maybe resetting or dragging in the middle of the night. There are a few things which make some places better than others for a desirable anchorage.
- Protection from wind, waves, and current in the conditions you expect to face.
- A bottom with good holding.
- Shallow enough to let out good anchor scope.
- Sufficient swing space for the scope you need.
So how can you, from the comfort of your nav station, decide what looks like a suitable spot to anchor? There are tools for this - with charts and cruising guides at the top of the list.
First, you check the charts looking for protected coves without too much water. Many charts even have helpful little anchors in common anchorages.
Second, check cruising guides, both books and online sources like ActiveCaptain or Waterway Guides.
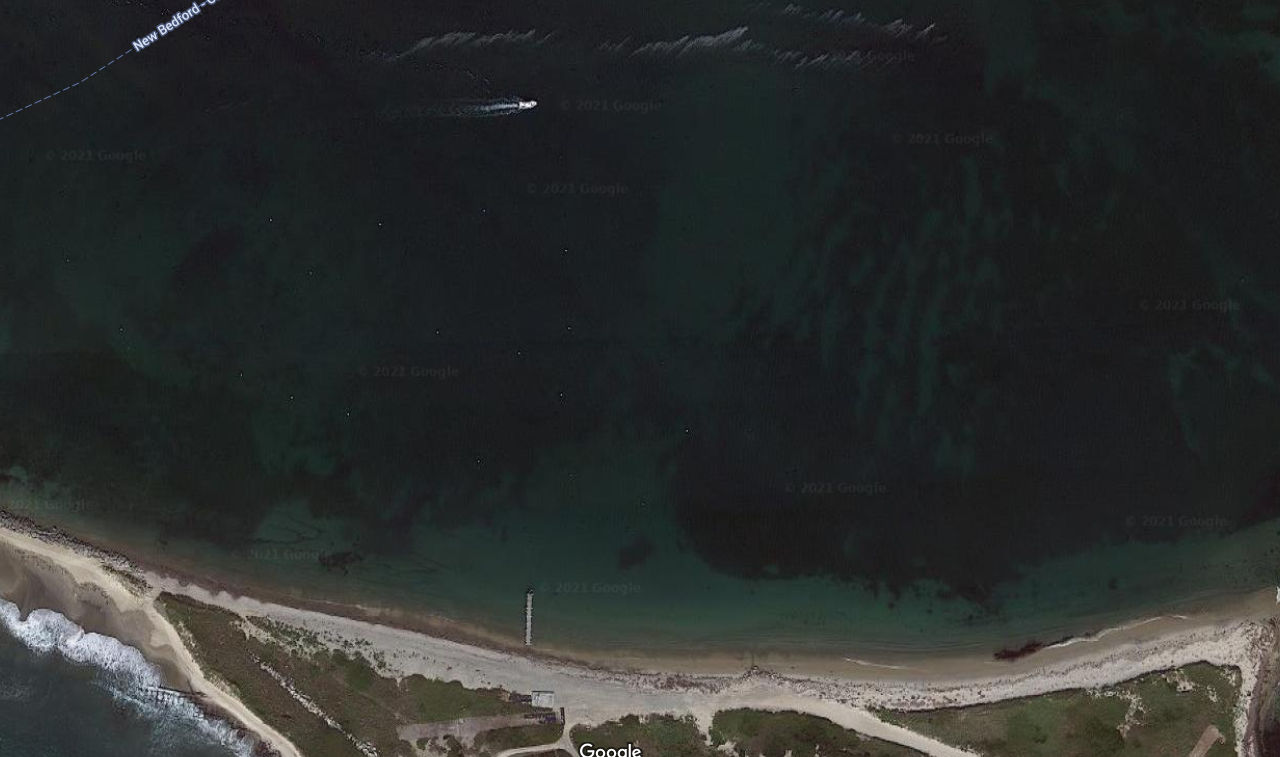
Third, if you've never visited the location, look at a satellite photo from Google Maps. Moored boats and even mooring balls are often visible if you zoom in far enough. Look for mooring fields encroaching or over running marked anchorages, where you may not anchor like the charts suggest. For a good example of the possible disconnect between marked anchorages and reality, check out charts and satellite photos of Nantucket Harbor side by side.
Finally, when you are closer to leaving, check the weather.
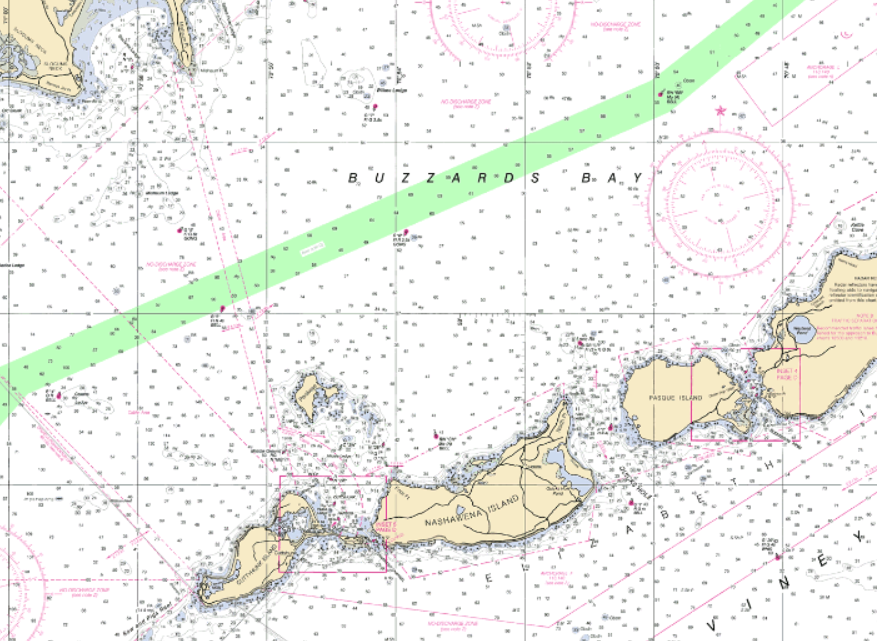
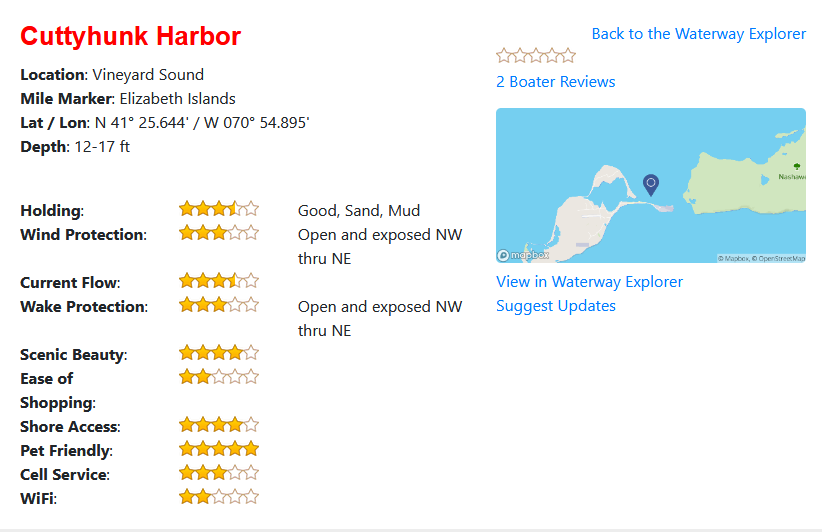
For an exercise, look at this bit of chart of one my of favorite cruising destinations in New England, Cuttyhunk island.
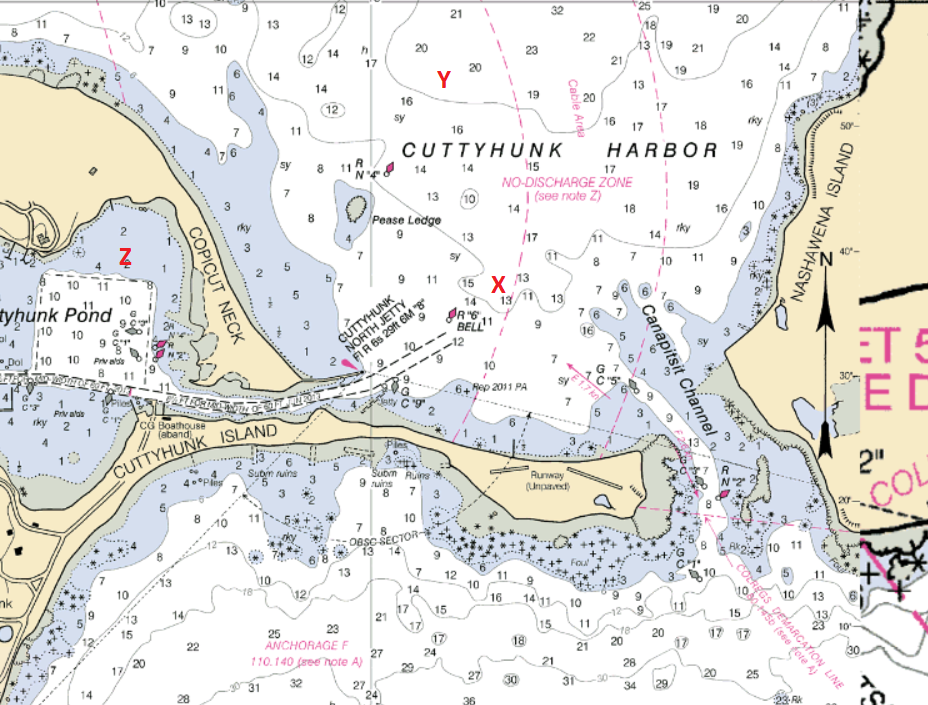
You can see three spots I've labeled X, Y, and Z.
What you can't see on this chart is that the square in the pond's interior is covered with moorings, and there are several rows of moorings north of that sand spit with the runway on it. Also, there's five or six miles of open water to the north of the island before you reach the mainland. You also can't tell that the area labeled "Anchorage F" is open water on Vineyard Sound, and unsuitable for any small craft anchoring because it's usually wave and swell tossed. It's not bad for surfing, if you don't mind all the rocks, but it's an anchorage only for ships.
The first thing this tells me is that this anchorage should be fine in most conditions except in a northerly. I can tell you from first hand experience that if the wind clocks to the north and hoots up into the twenties in the middle of the night, you will be uncomfortable within a very short amount of time. That's plenty of open water fetch to build up wind-driven waves, where the same wind from the south won't do a thing.
X is just outside the row of moorings in about fifteen feet or water. As long as you don't mind wakes from sport fishers blasting out of the channel at dawn on the weekends, it’s great. But maybe right on X isn't so great because of the traffic.
Spot Y avoids the channel traffic, but you're close to half a mile off shore. That's OK, but it might get a little choppy. It's better to tuck in as close as you can, so you're looking for a spot east of X and Y, but not all the way out to Y. You could anchor closer to Nashawena Island if you wanted to, but once you get there, you may find it's not as appealing as it's a long way in to the dinghy dock in the pond.
If you check a cruising guide, you will see similar information about anchoring there - it's comfortable except in a northerly, though there's some sea grass in the sand to be careful of.
The takeaway? If it's not a strong northerly, this is a pretty pleasant spot to anchor if you don't want or can't get a mooring.
And if you're in a trimaran or shoal draft boat, you can sneak right into the inner harbor and drop in spot Z behind the mooring fields.
As you cruise farther and get more adventurous, you'll find places which have less information. But for coastal cruising in places like Europe and North America, most anchorages are well documented.
Prepare Your Crew
With more than one person on the boat, someone is going to be on the bow working the windlass or dropping the anchor and someone will be on the helm. It only takes two, so that's what we'll focus on.
There are several key bits of information to communicate from bow to stern and back, so before you start, you need to be clear about who is deciding and who is reacting. It often makes sense for the person on the bow to make the calls because they can see where they're dropping, but not every crew works this way. My wife prefers to be on the bow but have me make "the call" on where to drop the anchor from the helm.
The information everyone needs to know is:
- Roughly where you want to drop the anchor
- When the anchor should drop.
- How much scope to use, or how much water you're dropping in. The person on the bow can't see the instruments.
- What to do with the engine, such as go in neutral, back down, turn the bow, and so on.
Talk it through as you approach the anchorage. Whoever is heading to the bow should have a rough plan, like "we're going to drop the anchor on a line between the stern of the white and blue boat, in about twenty-five feet."
If you all start on the same page, your odds are much better of finishing together.
Radios are good basic communication
Some crews swear by radios, since communication is instantaneous and unambiguous, assuming they work and you can hear each other. A quality set of duplex headsets with windproof microphones can help some people as they're learning this new skill, and it keeps you from having to yell to be heard.
Use hand signals as a backup
If you forget to charge the radios, or one drops overboard, or it's too windy to hear, you will need a backup communication system. After hundreds of times anchoring together, my wife and I have our hand signals down pat.
- Thumbs Up - Engine in forward (idle), shake up and down for more throttle.
- Thumbs Down - Engine in reverse (idle), shake up and down for more throttle
- Pointing Port or Starboard - turn helm in that direction
- Fist - engine in neutral and/or stop turning.
As we approach the targeted drop area, she watches me at the helm. When I want her to drop, I check depth and slowly flash fingers to show the number. She confirms by repeating the depth signal back. I confirm with a thumbs up or re-flash the number if her confirmation doesn't match, then she drops the anchor.
We've also got a few signals for when we pull the anchor, like "off the bottom" (hand pointing down and arm in a stirring motion) and "anchor up" (arm raised and hand waving in a circle).
Of course, with a well developed and practiced "back up" set of hand signals, we don't need radios and don't have them. If we anchor at night, we use lights to show on our hands for the signals.
A note on YELLING. Yelling is a common experience for inexperienced teams working an anchor, especially couples. It's best to avoid it. But sometimes you have to raise your voice to be heard over wind and distance when someone is forty feet away from you and upwind. If you have to raise your voice to be heard...watch your choice of words and your tone.
Pick Your Spot to Drop Anchor
Deciding on an anchorage is a strategic decision, but deciding where to drop in the anchorage is a tactical choice and you can’t make it before you arrive. Charts and cruising guides will help you plan, but you won't know how crowded the anchorage is or the day’s wind and weather until you show up.
You're looking for a spot which meets the criteria from above for an anchorage, but now you have to negotiate anchored boats, moorings that weren't on the charts, and other hazards.

The most important thing to remember when you pick a spot to drop anchor is that your boat will not end up where you drop the anchor. You will end up some distance downwind or down current of your anchor, and you will swing around the anchor as the wind and current change. The trick is getting good at estimating where you will end up.
With sufficient scope, your anchor rode will not point straight down, but will lie mostly on the bottom with only the catenary hanging off the bottom. Depending on your rode style, in normal conditions, the bow will end up some 60-80% of the amount of rode you have out from the anchor. The amount of rode you released plus the length of your boat is the most swing room you need for safety, but for politeness and comfort you will want to be at least a couple of more boat lengths from the next boat.
We've found that if we pick a spot in the middle of a line between the sterns of two well spaced boats and drop there, we settle out with good spacing. Remember, unless the wind drops to zero, boats with similar scope will swing the same way. If you're five boat lengths behind someone in a northerly, if the wind swings to the south, they will be about five boat lengths off your stern.
So don't be shy about asking how much scope your new neighbors have out and match them if you're comfortable.
Drop it and Set It
There are multiple ways and schools of thought on how to drop your anchor, from those who free-fall it when still to those who drop while moving backwards. The end target should be the same: do not allow the chain to pile up on the bottom or on the anchor.
If you do that, you may have a hard time setting.
This procedure is how we do routine set - an easy to catch bottom in moderate winds and current in daylight. We'll get into some more advanced anchoring techniques for tricky bottoms and bad weather [in another article](). Feel free to adapt this to what works best for you and your crew, it’s only a starting place.
Using proper anchor scope
The key to a good anchor set is letting out the right amount of rode. You can't really have too much out, unless it's crowded and the extra might swing you into other boats or shallow water. But it's easy to not let out enough.
Anchoring depth
Your anchoring depth is not the reading on the depth sounder when you drop the hook. Your anchoring depth is the depth of the water at the highest tide where you anchor while you are there. In areas with tiny tides this makes little difference, but if you're dropping in eight feet of water at low tide in an area with a five foot swing, it will make an enormous difference in your scope calculations and you won’t have enough out at high tide.
Check a tide chart if it isn't high tide when you drop. You may need to estimate the tide from the time, or by looking at the shoreline for exposed rocks.
Most of the world has a twice daily tide cycle, with each tide running a little more than six hours from low to high, then six from high back to low. To estimate the high tide depth, take height of the nearest high tide and subtract the nearest low tide height. This is the "swing" of the tide.
Next, figure out how many hours you are from that high tide, then divide that by six. Multiply this number by the "swing" height and this is about how many feet your boat will rise from where you are now while you are dropping.
EXAMPLE:
Depth Sounder Reads: 18 feet
Next High Tide: +5.3 feet in 2 1/2 hours.
Last Low Tide: +.5 feet
(tide measurements are given in change from Mean Lower Low Water)Time to tide ÷ 6 = 2.5/6 = .417
Tide Swing = +5.3 - +.5 = 4.8.417 x 4.8 = 2.0 ft.
So you can expect the depth to read about 20 feet at high tide, and this is the number used to calculate scope. While this is only an estimate, it's close enough to work with. But it won't hurt to always round the maximum depth up for safety.
The scope calculation
There's one other number we need to discuss in calculation - the bow height above the water. Depth for scope doesn't calculate from the surface of the water, we're concerned about the entire amount of mechanical advantage and leverage involved in pulling on the anchor, so we need to know where the anchor rode applies it load to the boat. That is at the bow, on the anchor roller, which is always a few feet above the water.
So the total depth you need to calculate scope is: Depth at High Tide + Bow Height from Water
The Bow Height is a one time measurement, which you should know for your boat. It's usually 4-6 feet, depending on the size of your boat. But ignoring it means if your scope is 7:1, you're letting out up to 42 feet less rode than you need for good holding.
Scope is the ratio of rode led out to the total depth (high tide + bow height) you're anchoring. 7:1 scope is seven times the depth, 5:1 scope is five times the depth, and so on.
All chain rodes can use less scope than rope/chain combinations, but it never hurts to use extra. We use 5:1 with our all chain rode for most normal, non-storm conditions for overnight anchoring. For rope/chain rodes, the recommendation is 7:1.
EXAMPLE:
Expected depth at high tide: 20 feet
Bow Roller Height: 4 feet
Total depth for scope calculation: 24 feet
So setting your scope at 7:1, you will need to let out 154 feet (24 x 7). For all chain, you can use 5:1 which is 120 feet (24 x 5).
Anchoring in Lakes and Rivers: if you are anchoring some place without tides, you can skip the tide swing estimation. Unless you're on a man-made lake with a dam, where they may raise and lower the water level! Check the dam management site for notes on any planned water height changes before you anchor.
For non-tidal rivers, you rarely get depth changes. And the current will keep your bow pointing upriver, so motor up river to your drop spot and drift back to set. Tidal rivers may require two anchors, something a little too complex for this introductory article.
If you want to learn more advanced anchoring techniques, you can check our article on advanced anchoring techniques. There, I'll go over all kinds of different situations.
Try for a controlled drop
We prefer to pull our boat to a stop to where we want to drop, then lower the anchor as quickly as our windlass will allow. But we have an electric windlass, and if you're lowering by hand, you may not have so much control. So a few quick tips can help.
- Always try for a controlled drop. Don't just toss the anchor overboard and let the rope fly out, you'll have no way to deal with it if the rode bunches or tangles and goes overboard.
- If you have a rope rode, before you drop, pull it out and fake it out on the deck - lay it out on the deck so it's free of snarls and tangles and will flow freely. Tie the end to something sturdy.
- Dropping a rope rode by hand, wear gloves if you can so you can ease the drop and control it without rope burns.
- You can free fall an anchor by disengaging your windlass, but be ready to brake it if there is a problem.
To drop, we take the following steps. We approach our drop spot from downwind since the wind will slow us down and blow us back when we’re dropping.
- Idle upwind close to the point we want to drop, then drift to it in neutral.
- Signal the drop.
- Allow the boat to drift back as the anchor drops.
- Pay out limited rode until you reach 3:1 scope, then stop and allow the anchor to catch the bottom. If done right, this should make sure no chain piles up on the bottom.
The set is successful after a solid tug
Once you've reached step four, you're ready to finish the job. The person lowering the anchor should keep a hand or foot on the rode once you've hit step four, this with let them feel the anchor on the bottom. Any bumps as it drags without setting will come right through the rode, and they'll feel a solid tug when the anchor catches.
When we feel it a catch, we engage reverse in idle to tug on the anchor, just to make sure it's caught. Keep that foot on the rode and feel what's happening.
When it's caught well, put the engine in neutral and drift back to pay out the rest of the scope you need for the depth of water. When this is done, tie off the rode to a cleat or secure it, after which the helm should go into a hard reverse for ten or fifteen seconds to dig the anchor in tight.
Keep that foot on the rode to feel if the anchor drags or breaks out. Once you've backed down on the anchor for a good 10-30 seconds without popping it loose, you are set. Put the boat in neutral and tidy things up.
Set Snubbers and Secure
If you have an all chain rode, now is the time to attach your snubber(s) and ease out a little more chain to put the load on the snubber. You want the weight of the boat sitting on a cleat, not on your windlass. Your snubber should reach down almost to or even into the water, and shouldn't rub up against any chafe points.
For a rope/chain anchor, it's time to clean up the unused rode and make sure the bitter end is secure. When we used rope rodes, we did not leave them attached to the boat with the rode was in the locker, but you can do that if you have a spot. Otherwise, tie that bitter around something sturdy, just in case there's a problem. If you have to adjust the rode during the night, you don't want to lose if overboard if you drop it.
Tie it to a winch, or another cleat, or around the mast. Just make sure they it's not wrapped around anything you can damage if it pulls taught.
Keep an anchor watch
There are two kinds of anchor watch we always keep on board. The first is the "first hour" watch. Our rule is we wait at least an hour after anchoring before leaving the boat. This gives you time to make sure your set is solid while you tidy things up on board. More than once we've seen excited boaters come in, drop the hook, then lower the dinghy and be off to play within minutes. And more than once, we've had to deal with boats near us dragging right after they've been left.
Manual Watch
Get a hand bearing compass and a pad and pen, we're going this the old fashioned way first. Look on shore for some noticeable landmarks - extra tall trees, flag poles, impressive monuments and statuary, colored roofs - anything which is easy to spot and distinct. Bonus points if it has lights on it.
Next, pick three marks if you can, and take compass sightings on them. It's best if you sit in one spot to take the marks rather than move around the boat. Make note of the bearings.
As long as those bearings change little, you haven't moved. So during the first hour after you anchor, re-check those bearings several times.
You will get some small amount of change, especially in closer objects, but it shouldn’t be more than a degree or two. Your boat swings at anchor, of course. That's one reason you need a few marks.
If you find marks with distinctive lights on them, then you can repeat this check any time of day or night if you think you might be dragging.
Electronic Anchor Watches
The manual method of drag detection works, but has drawbacks. You must be awake to do it, and it requires an active action on your part. So it's less helpful if you want to get a good night’s sleep.
Most marine GPS units, chart plotters and many AIS units have a drag alarm function. There are several apps for phones and tablets on all platforms. Get one, and learn to use it.
The thing to remember about ANY electronic anchor alarm is most of them don't know where your anchor is, they only have GPS location, which is not over thhe anchor. A GPS in the stern of a big boat with 200' of scope out can swing through circle almost 500’ in diameter, and that will look like a dragging anchor to most drag alarms.
What you care about is if the anchor moves, not if the boat moves, because a boat at anchor is always moving. A better drag system allows you to estimate the anchor position. You can also set a watch on a handheld or your phone from the bow when you drop, and that will give you a good approximation of the anchor.
Most alarms work on a "drag radius" - if your boat moves out of that circle, it goes off. Learn to adjust this for your boat and your expected scope, and can spend a quiet night sleeping while your electronics stand by to wake you up before things get exciting.
If you're nervous about leaving your boat, install a drag app for a phone that will send a text alert or make a phone call if it detects dragging. Set that app to call another phone in your crew. Then leave the drag alarm phone on the boat, plugged into a charger, with the drag software running. You can enjoy dinner on land with less worry - your boat will call you if you may be having a problem!
Any Questions?
Anchoring is a complex topic, with a lot of variables which go into getting your boat secure for the night. Questions are natural, and we've tried to anticipate a few for you.
What if I can't let out enough scope?
A 7:1 scope is a lot in a crowded anchorage. You may find when you show up on a summer holiday weekend that boats are packed in and lucky to get 5:1 out. If you come in and let out more, you will bump into boats. It is important to keep your anchor scope consistent with the surrounding boats, or you will have problems. However, if you can't let out enough scope to make yourself comfortable, you don't have a lot of options.
You can move to a different anchorage, or anchor on the outside of the anchorage where you can use more scope, though the water will be deeper. Or you can deal with the short scope for the stay and set your drag alarm on a smaller radius and keep a few fenders on deck for quick access if things get close.
How do I to tie the anchor to the boat?
Tie rope/chain anchors to a sturdy bow cleat with a cleat hitch, and secure the bitter end to something stout enough to hold the boat as a backup. I liked to tie a big bowline around the base of the mast, but a winch will work, too.
Chain rode should be snubbed, and the snubber tied to a cleat, but attach the bitter end to the boat. Most anchor lockers have a ring installed to attach the rode. We prefer a length of high modulus line like Vectran or Spectra to tie the last link to this ring, rather than hooking it with a metal shackle. You can use a shackle, but if you have to cut the rode in an emergency and it’s under load, you will need a metal cutting tool to get it off. The super strong Spectra line will cut with a knife.
Can I anchor a boat by myself?
Yes, you can, though you need to be quick on your feet unless you have windlass controls and a chain counter at the helm. The seven basic steps are the same, but you will have to approach your drop spot slowly and come to a near stop with the boat in neutral before you run up and drop the anchor.
You won't be able to feel the rode with your foot when you back down, so take it slow and let everything settle, and keep on eye on the GPS when you back down to see if you're moving once the rode is stretched.
Can I sail off my anchor?
Yes, you can. It's an advanced skill which is beyond this article to address, but it's a handy skill to have in case you ever have engine troubles. You need to get the boat moving up to the anchor to take the weight of the boat off your windlass, so use your main sail.
Can I anchor a boat with two anchors?
You don’t need two anchors often, and you shouldn't have two anchors out when boats around you do not, since they will not swing like you. Two anchors are a specialty application, such as anchoring in a tidal river, or in a strong, steady current, or with a stern anchor to keep the bow pointed in a set direction.
Should you drop anchor in a storm?
That depends where you are. If you are in the open ocean, you usually can't because it's too deep. If it's shallow enough to anchor, head for deeper water and away from land if you can't get to a safe harbor.
Find a protected anchorage and can get to it if you can, then dropping an anchor in sheltered waters is a good way to ride out a storm.
How do I anchor a boat in deep water/the ocean?
You can't anchor a boat at all in water deeper than your anchor rode; the anchor needs to touch the bottom! Since you need at least 3:1 scope for a temporary "lunch hook" set and more for an overnight, it's very hard to anchor in water deeper than about 1/4 the length or your rode. In an emergency, you can anchor with whatever scope slows you down, but anything less than 3:1 isn't restful and less than 4:1 you should not leave the boat unattended.
A "sea anchor" is not an anchor at all, it's a device like a parachute or scoop to slow your boat and keep it control in storm conditions. It does not stop the boat or secure it.
For more information, check out this article for more detail about anchoring in the ocean.
How big of an anchor do you need?
Anchor manufacturers publish tables of size and weight recommendations for different boat dimensions. The best recommendations have guides by boat weight and by length. Check both tables and choose the largest one which comes up. It's better to be a little too big unless you are hauling the anchor by hand.
Check our full guide to anchors and ground tackle and selecting an anchor for more details on sizing anchors.
Did you find the answer to your specific question?
👍 0 👎 1


Leave a comment